Tag Archives: WWI

Huzzah Hobbies Flames of War Great War Tournament

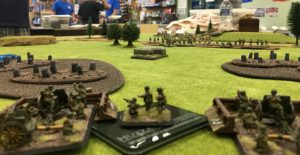
Two weekends ago, Chris at Huzzah Hobbies ran a Flames of War – Great War tournament.  (I’ve mentioned it before.)  In addition to being glad for the motivation to just paint the living hell out of my stuff, it motivated me to get out and play a bunch of games (to figure out how to play the dang game): five might not seem like much (objectively, it probably isn’t), but I think it’s more games than anyone else at the store played in the ramp up.

Of course, I started out not-very-good about taking pictures, and got progressively worse as the day went on.  So, I’ll pretty much just Photodump:

Game 1 was the Big Push, vs Scott.  I’d built my list to Defend, but I think my unbelievably bullshit good rolling had a bigger hand in the game than anything else. That one squad repulsed something like 5 or 6 Assaults.

FoW-GW 2016 Tournament Game 1 (2)

FoW-GW 2016 Tournament Game 1 (3)

FoW-GW 2016 Tournament Game 1 (4)

FoW-GW 2016 Tournament Game 1 (5)

FoW-GW 2016 Tournament Game 1 (6)

FoW-GW 2016 Tournament Game 1 (1)

Game 2 was Dust Up, against Chris.  I feel like I screwed up in a couple of major places during this game, but the combination of my totally BS good luck and Chris’ notoriously bad luck kept things swinging my way.  In the end, though, it was a draw.

FoW-GW 2016 Tournament Game 2 (2)

FoW-GW 2016 Tournament Game 2 (3)

FoW-GW 2016 Tournament Game 2 (4)

Game 3 was Encounter, against Josh (?).  This was the most interesting of the three games, I think.  We both ended up only fighting along one half of the board, but there was a lot of maneuver, which made for a really fun game.

FoW-GW 2016 Tournament Game 3 (1)

FoW-GW 2016 Tournament Game 3 (6)

In the end, I came in second, which is pretty good. I came very close to winning all three games, but I don’t feel bad about that being ‘very close’ and not ‘actually’ because so much of that was due to an unreasonably strong hot streak with the dice.

I really like the Great War version of the game (a good thing, since I now have so much of it, and painted), and I definitely feel good about the decision to start picking up stuff to play FoW in WWII (which I know is going to be Different).

Flames of War – Great War – German Empire

FoW-GW-GE - A7V - All

Got this stuff into the lightbox yesterday.  I’d been putting off photographing the team bases, because, as we know, 15mm figures are not attractive on their own… only en masse.

Anyway, should be the last you hear about it for a bit, I promise.

Here’s the CiC, 2iC, and various weapons:

FoW-GW-GE - Weapons


The 7.7cm FK96 n.A. battery & limbers:

FoW-GW-GE - Artillery Battery

The Maxim HMG platoons, as well as the bunkers and gun nests they can deploy into.

FoW-GW-GE - Machine Guns

Some objective markers:

FoW-GW-GE - Objectives

One of the three Stoss platoons. The exercise of setting all of these up in the lightbox began to feel like a Soviet military parade, so I decided to just photograph one platoon each of the Stoss and Infanterie.

FoW-GW-GE - Stoss PlatoonFoW-GW-GE - Stoss Team

The Infanterie Platoon:

FoW-GW-GE - Infanterie PlatoonFoW-GW-GE - Infanterie team

And, finally, a photodump of the final, weathered, A7Vs.

FoW-GW-GE - A7V - 63 RightFoW-GW-GE - A7V - 63 LeftFoW-GW-GE - A7V - 63 FrontFoW-GW-GE - A7V - 63 Rear

FoW-GW-GE - A7V - 61 RightFoW-GW-GE - A7V - 61 Left FoW-GW-GE - A7V - 61 FrontFoW-GW-GE - A7V - 61 Rear

FoW-GW-GE - A7V - 06 RightFoW-GW-GE - A7V - 06 LeftFoW-GW-GE - A7V - 06 FrontFoW-GW-GE - A7V - 06 Rear

FoW-GW-GE - A7V - 03 RightFoW-GW-GE - A7V - 03 LeftFoW-GW-GE - A7V - 03 FrontFoW-GW-GE - A7V - 03 Rear

A7Vs Just About Finished

Got to spend some time over the weekend wrapping up some A7Vs: more than could ever practically be run at once.  They’re not quite done – after taking and assembling these photos, I decided to take some weathering powders to them, loved the result, varnished them, and therefore need to weather them again. But they’re close.

This is my first spin with oil washes.  I think they worked quite well; I’ll have to play around with them some more at a larger scale, but this is definitely going in the toolbox.

Also, these weren’t taken in the lightbox; just in front of some paper under the arch. When I take their final photos, I probably should throw in a penny or something for reference for my family members who don’t know what (“Flames of War” or “1:100” actually means in terms of scale).

503 “Faust”(?) and 506 “Mephisto”

503-506 Before

503-506 Before

503-506 After

503-506 After

563 “Wotan” and 561 “Nixe”

563-561 Before

563-561 Before

563-561 After

563-561 After

The rough freehand on 503 is a big part of why I decided to go ahead and do transfers wherever possible. There are also some shoddy Vs on the front of 561 – the decals provided were too large and would have run afoul of rivets (certainly more afoul than my brush did).

Not perfect, not by a long shot, but pretty good for a small scale tank.  I’ll have to grab one of the 28mm ones from Trenchworx at Historicon.

Bolt Action WWI Rules

I’ll be running Amiens again at Madicon this weekend (Saturday morning, 9AM! Be there, or be somewhere else!), so I really need to get around to posting the dang updated lessons-learned rules (“Post BA WWI rules” has been in my to-do list all February).  Then, I’ll just stick the PDF in a link on the side and that should be the last you hear of it for a while.


Bolt Action – Small Scale Rules Modifications

All measurements and ranges (formation, weapon ranges, morale, etc.) remain unchanged, with the following exception:

Movement

  • Basic move rate for infantry units is reduced to 4”. Running infantry units is 8”.
  • Vehicle movement is also reduced: 6” for tracked and half-tracked vehicles, 9” for wheeled vehicles.

This worked out about perfect. Carrying over weapon ranges feels just right, but 6″ movement felt all kinds of wrong at this scale. Stepping it down worked great.

Bolt Action – Great War Rules

General Rules

Barbed Wire

Obstacle.  Does not block line of sight or provide cover.  If an infantry unit Advances over it, roll a d6 – on a 1-2, the unit is Entangled: it must stop movement before crossing the barbed wire and takes a hit.  An Entangled unit may not benefit from a Down order.

A section is removed when a tracked vehicle moves over it, or when a unit with the Pioneer rule and two or more models in contact with it at the start of their activation is given a Run order; this consumes all of the movement of those models. A tracked vehicle may only remove one section at a time (ie: it cannot drive over two adjacent sections) but may remove more than one section in a single movement (ie: drive over one line of barbed wire and continue on to drive over a second, third, etc).

This worked out fine.  I don’t think it came up all that often, but barbed wire was an effective deterrent: the Germans used it in an attempt to control the flow of the British as much as they could.  So: as expected.

Creeping Bombardment

This is a line across the width of the table.  In the first turn, it activates first and advances from the British edge of the table.  In subsequent turns, it gets its own Activation die.  When it is activated, it will advance 2d6+6″ towards the German table edge.

Shooting across it provides heavy cover.

Any unit within 6″ of this line is Caught in the Bombardment – roll when giving the unit its order or when a unit moves to within 6″ of it.  Units may go Down in response to being Caught in the Bombardment:

Amiens - CitB - Order Chart

Exposed units may not be given a Rally order when Caught in the Bombardment.

After advancing the Creeping Bombardment, roll a die for any Barbed Wire sections now within 6″ of this line.  On a 6+, remove it.

Amiens - CitB - Consequences Chart

I had to throttle back on this table, big time. In my first playtest, even being Entrenched didn’t help much.  Although this represents a bigger deviation from basing the table on being hit by a Heavy Howitzer, I think it worked better.  

Bunkers

Up to 20 models may shelter in each bunker.  Units in a bunker are never Caught in the Bombardment (but might be treated as such if they exit the bunker into the bombardment). Otherwise, bunkers are treated as buildings.

This didn’t come up in the game: nobody hid in the bunkers.

Gas Masks

A unit given an Ambush, Down, or Rally order may put on or take off their gas masks.  (This applies to vehicles as well.)

A unit wearing gas masks may not be given Advance or Run orders. A vehicle may not be given a Fire, Advance, or Run order.

A model wearing gas masks is at a -1 penalty to hit with shooting and always fight last in Close Combat.

This didn’t come up in the game: gas wasn’t used at Amiens.  I’d like to give them a try at some point.

Poison Gas

Poison Gas functions as a smoke fired from a Heavy Howitzer (6″). When a model is contacted by a poison gas cloud, roll a d6:

  • The model is wearing a gas mask: The model is killed on a 6. Veterans may reroll failures.
  • The model is wearing a gas mask: The model is killed on a 2+.

If a vehicle is ‘killed’ by this roll, treat it as a Knocked Out result.

This didn’t come up in the game: gas wasn’t used at Amiens.  I’d like to give them a try at some point.

Reserves/Outflanking

Units may not be deployed in an Outflanking maneuver.

However, units brought on from Reserves may be brought in along the edge of the table at the trenches, with an additional -1 penalty for the trenches nearest their side of the table, and a -2 for the trenches furthest.  This is decided when making the order check.  So: a unit may be brought in from Reserve along the table edge at -1 morale, the near trench at -2, and the far trench at -3.

Originally, sides could bring in reserves from trenches that they “controlled” (so, once the British crossed Trench 1, the Germans could no longer bring in reserves from that trench and the British could).  This update adds flexibility and risk-reward.  I think it’ll work out.

Trenches

Units may not Run across trenches. Trenches provide Heavy Cover as if it were a building.  When a unit is hit by an HE round in a trench, roll a d6 – on a 1-4, the Extra Protection rule is not ignored (on a 5-6, it is ignored as usual).  To clarify: when a unit is hit by an HE round in a trench, on a 5-6, they require 6s to be wounded.

Units may fire at other units down the length of a Trench using true line of sight, but any model more than 6” away is always out of range.

At the beginning of the game, determine if trenches are wide.  If trenches are wide, vehicles may not cross them except across a fascine.

These worked out as expected.

War to End All Wars

The scope of this conflict ranges for miles and miles and miles along the line along the front.  When an Order Die is removed from the bag (because a unit is eliminated) it may be recycled.  To recycle an Order Die, select a dead, non-vehicle unit from casualties (or assemble an infantry squad from casualties): non-vehicle, non-team units recycle on a 3+, vehicles and units with the Team rule recycle on a 5+.

If you succeed, the unit is placed into Reserves at the beginning of the next turn.  If you fail, the Order Die is removed from the game. You do not have to immediately recycle the Order Die.

This was the big lessons-learned from the game: by allowing the players (especially the Germans) to infinitely recycle their units, effectively removing any consequences from losing a unit.  “I’ll run the flammenwerfer forward: if it dies, that’s okay! It’ll be back next turn!”  This will help keep things from being hopeless but will make using a unit, especially a Team, still hurt.

Army Special Rules

Britain

Mark V*s

The Mark V* tank had space to transport infantry; this was not done in practice because the conditions were awful.  On disembarking from a Mark V*, its passengers immediately take d3 pins and must test before being able to complete their Order.

Mark V*s were lengthened to handle wider trenches; as such they never require fascines to cross trenches.

The British declined to use these as transports, and the trenches weren’t wide so neither of these came up.

Germany

K Bullet

After June 1917, German machine guns get +1 Penetration against tanks.

This was, I think, key to the Germans not just being miserable all game. It gave them capability to deal with the British tanks.

Stormtrooper

German NCOs may not be removed with exceptional damage.

I don’t remember if it came up or not. Exceptional damage is an important rule, but could slow things down in a larger game so I’m tempted to remove it entirely.
Amiens, Aug 8, 1918

Amiens - End (9)

The Amiens game (finally) went down on Sunday with, it appears, great success. Everyone had a good time, the rules held up (there were notes, but when wouldn’t there be), and things went smoothly (the game took ~4 hours, with 6 players and 43 Order Dice, so I think that counts as “speedy”).

I’ll post up the rules in a separate post, but I think they held up well; the smaller scale worked great and most of the period specific rules also accomplished what they needed to.

Casey, John, and Rhett were the Germans, desperately trying to hold off the British as long as they could; Gavin, Keith, and Steve were British trying to break through the German lines.

The Germans deployed: a lot more thought went into the placement of Barbed Wire than I’d anticipated.  Many of the German units deployed into Ambush, forgetting that the push would be preceded by a Rolling Bombardment. (Note: because there were 43 Order dice, we used regular dice and used the chart.  Black was German, White was British, Red was the Bombardment,)

Amiens - Turn 0 (2)

Between the bombardment and nearly every German unit starting the game with an Order, Turn 1 was pretty much a British show.  The Brits decided to lead with all of their tanks, holding the infantry back for subsequent turns.

Amiens - Turn 1 (2)

While the bombardment was effective in suppressing the defenders, it slowed the attackers down: advancing too far too fast killed a Mark V.

Amiens - Turn 2 (2)

The defenders fired Minenwerfers relentlessly at Tanks but weren’t able to hit a single. one. all game long.  Machine Guns, with the K Bullet, were more effective (I’m pretty sure that one died to a Machine Gun).

Amiens - Turn 2 (4)

Amiens - Turn 2 (9)

The attackers had a tough time making progress on their left, but the Australians along the right made more headway.  (Yes, the Australians were on the other side of the Somme from the British; I wanted Australian troops, so I gave them Australian troops.)

Amiens Turn 3 (2)

The “infinite reserves” rule I used kept things from being hopeless and boring for the Germans, but it made consequences too slight: it’ll be the first thing that gets tweaked.

Amiens Turn 4 (1)

The German presence along their right was solid….

Amiens Turn 4 (4)

Which meant their left was where the decisive action would take place.

Amiens Turn 4 (6)

The Brits were able to push into the second trench line, in the end.

Amiens - End (2)

At Turn 6, the Brits had established a foothold in the second trench line, and the game ended.

Amiens - End (7)

Per scoring (which also needs some tweaking), it was a blowout for the Germans: although the British made headway, their progress was too slow.

The Table:
Board

I did most of this, but got some significant help from Steve & Rhett.  This is a concession: this isn’t what the German lines looked like in the Summer of 1918, but it certainly feels a lot more WWI-trenchy, and will, hopefully, see quite a bit of use in other battles.  They’re two 4’x2′ boards; we got clever while laying them out: the two red Xs above line up: in the future, we’ll be able to line them up side-by-side with two more boards across the front for a wider battle, and we’ll be able to spin the front line around and place a third board across the middle for a more standard 6’x4′ table.  All the trenches are duckboarded; the second line is built along the edge of a road, with hairpins, and two bunkers back by the orange !s.

I made a billion barbed wire stands: plasticard crosses supporting 28 gauge wire spun into circles. I’ll probably redo the wire: I had a marker to wrap them around, which meant they’re uneven.  I also, before game, painted up the crashed Sopwith.  Why is there a crashed Sopwith? Because I wanted a crashed Sopwith.

I’m hypercritical of myself, so all I can see are where things fell short of where I’d wanted them, but I really did hit a point where I just said, “Screw it; close enough.” Maybe I’ll circle back around and punch up some things, but there’s definitely going to be some things I just live with.

I’m going to revise the rules a smidge; I’ll run it again at Madicon  in March and then Historicon (Cold Wars isn’t in the cards for me this year).

I’m pretty glad to be done with the game, though: I’ve been working on this thing since September: it’s dominated my hobby time and I’m ready as hell to be working on something in 28mm again… as well as to be working on something that isn’t Amiens.

Here’s a photodump of some pictures some other folks took (Casey, Steve, Keith):

12651139_10208431417765350_4092109586285916807_n 12661906_10208431416965330_4988182950391481353_n 12592339_10102622084563467_2854164236262451023_n 12654280_10207144886993312_708625732686879589_n 12647380_10207144878793107_4164537040195902353_n 12650797_10207144866552801_8585733072724430317_n 12654286_10208431458086358_5886674518698590403_n